Item Category Generic items: Air fittings ASAs and drops Barrels Camera parts Detents Feednecks Marker parts: Autococker Automag DLX Luxe Eclipse Empire Mini classic Empire MiniGS Empire Axe classic Empire Axe Pro FEP Quest Impulse BLAST / Field One Shocker Sport Shocker SFT / NXT Shocker RSX / XLS Shocker CVO Tippmann X7 Tippmann Crossover TM7 / TM15 Vanquish
Information Tech support Dealers Warranty Contact About Nummech Reviews Development lab Legal Promo images

Development lab: TM-7 Metal mode switch This was originally a suggestion from TheEnglishGuy, who is one of our customers that I have used in the past for opinions and testing on products under development. He had the idea for a metal replacement mode switch for BT TM-7 markers after experiencing a day where his stock mode switch got snagged and twisted too far (breaking the actuator prongs that connect it within the marker). He replaced the broken part with a handy spare, but the new switch then got damaged too because fragments of the first switch were left inside the marker.
At this point I knew a machined, metal replacement would indeed be warranted. The only question at this point was whether or not we should directly replicate the shape of the stock switch, or take the time to change the design along the way. Fortunately TheEnglishGuy had already taken the time to modify one of his damaged switches and send it to me so I could examine it next to the stock version. His suggestion for a modification was a shorter, thinner lever that would be more difficult to snag on nearby objects. It would also require more force to switch modes due to the shorter lever, which I believe to be a good thing, since it makes a more "tactile" feel when switching from one mode to another.
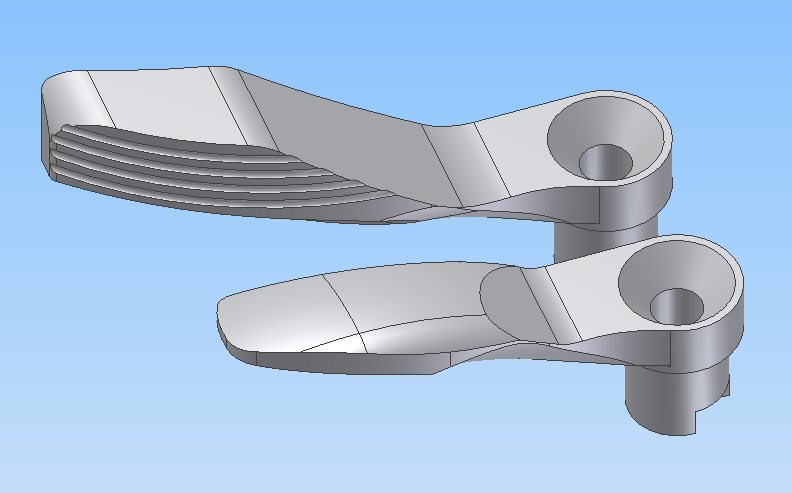
Seen above is the stock switch (top) along with TheEnglishGuy's modified switch (bottom).
The altered design has already been somewhat implicated with the TM-15 version, but the TM-7 owners don't have the same part available to them. I also took the time to dig up some old forum posts and found some evidence that at least a few other people had also played around with modified switch levers too. This solidified the idea that a smaller switch was warranted, even if it wasn't a required change. The more ways to make the metal mode switch different from the stock, the more unique of an upgrade it will be.
I wanted to write this page because it shows some of the earlier stages of development for a part, even if it's a simple component. A person had the raw idea (the need for a stronger part, and reasons to change the design) then followed the correct process of experimenting with the part in a way he saw fit. It could have been a picture or drawing but he took the time to develop what we would call a "rapid prototype" that can't actually be used but would serve to prove the concept. The proof of concept was then brought to us so we could take it to the next step. We rely on the opinions of others that already have a concrete idea bouncing around in their head so this works out perfectly for everyone!
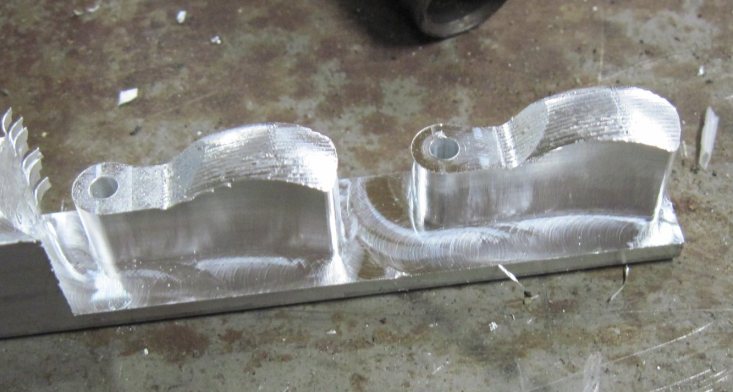
Prototype metal mode switch, after completing the first machining process.
Revision & production The prototypes were completed but some revisions were necessary to perfect the design. Two different switch models were initially prototyped; while they're the same on the outside, they're actually designed to "point" in different directions when installed on the marker. We needed to figure out the perfect switch angle in order to mass produce the items, since the shorter lever doesn't point to the same position when installed.
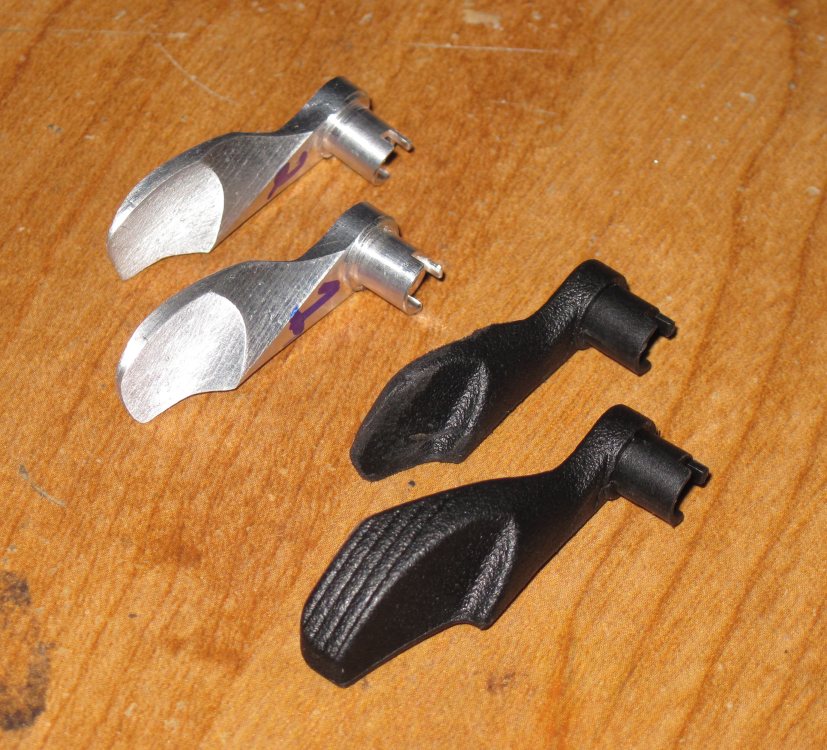
Metal mode switch prototypes, along with a stock plastic switch and modified plastic template switch.
Once the correct alterations were made, the mode switch was re-processed into the actual production scheme that would ultimately be used to make a batch of parts. The switch lever is a difficult item to create since it has such a long and thin shape, so customized vice jaws are used to hold them upright so the curved shape can be effectively milled into the top.
After machining, the switches are sent through a robotic blasting workcell where their dusted finish is applied (see the picture below). The matte finish is very succeptable to dirt and fingerprints, so they are immeditely anodized afterwards to avoid contamination.
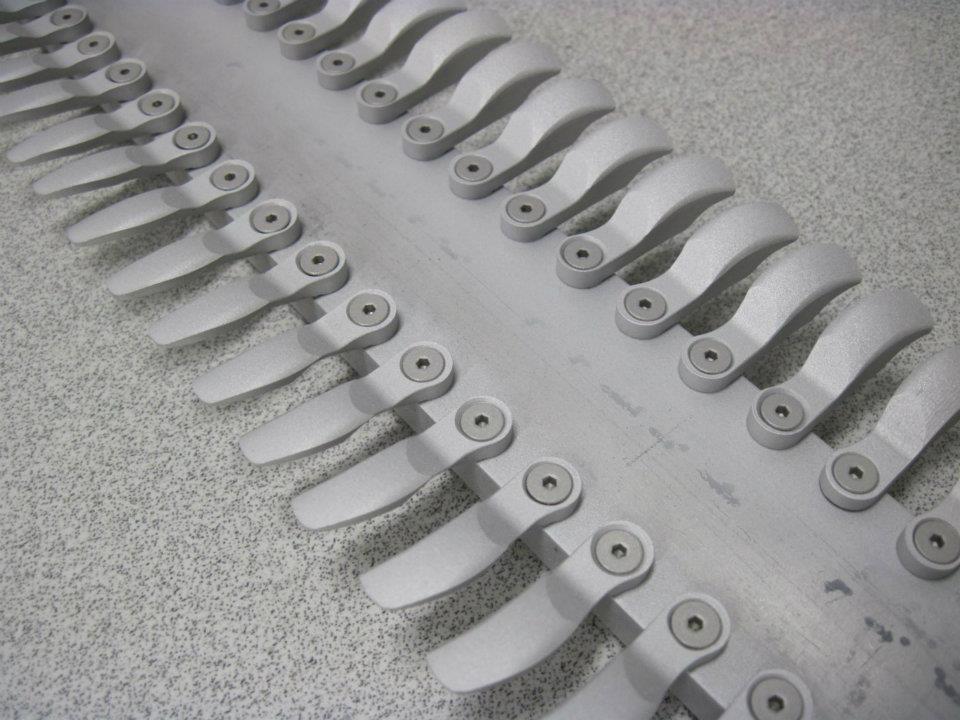
Production assemblies of multiple items (such as this switch rack) help to reduce operator fatigue by lowering production time.
During anodizing, the surface of the items are "etched" using an acidic soda solution, which allows the anodizing layer to bond more effectively. The etching process can cause the surface of glossy parts to dull slightly, however it greatly improves the quality of matte-finish items such as these. The dusted finish will appear more subtle and consistent in appearance. We use the same process with our other "all blasted" products such as the Contour camera mounts.
I'm happy to officially announce that the Metal Mode Switch is now available for purchase for all TM7 owners!

